Voice Calls
In this section, you can send voice calls to contact groups, as well as to numbers that do not belong to any group. You can control voice surveys, upload audio files, and view outgoing voice calls.
When selecting "Voice Calls" from the main menu, the following set of options will appear:

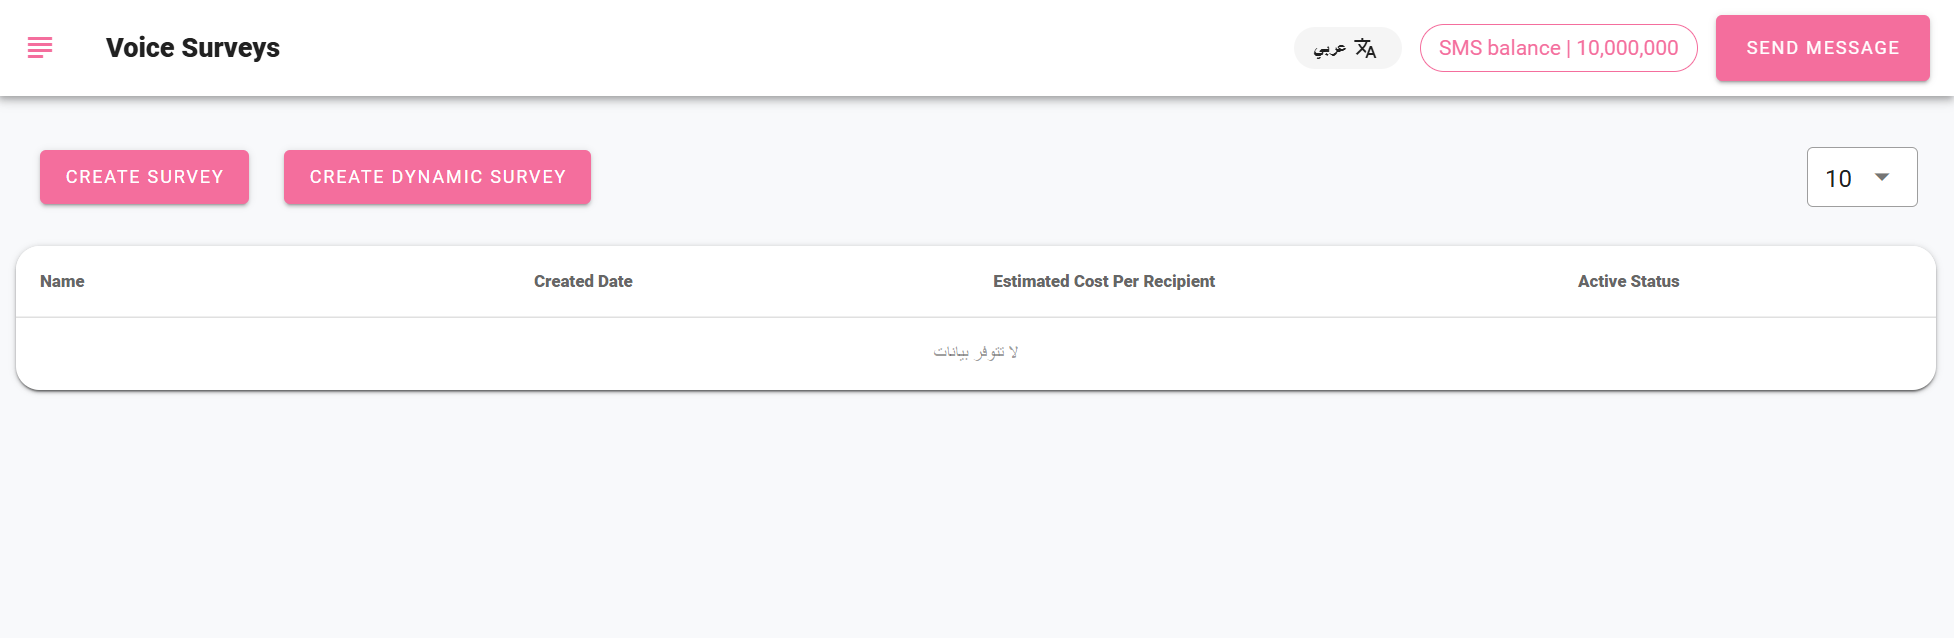
- Voice Surveys Page
Through this page, the user can create voice surveys that recipients will listen to. A static voice survey can be created, which is a set of sounds played based on the recipient's selection. This type of survey can be sent to multiple recipients at the same time.
An interactive voice survey can also be created, which contains sounds and variables entered at the time of sending. This type of survey can only be sent to one recipient at a time.
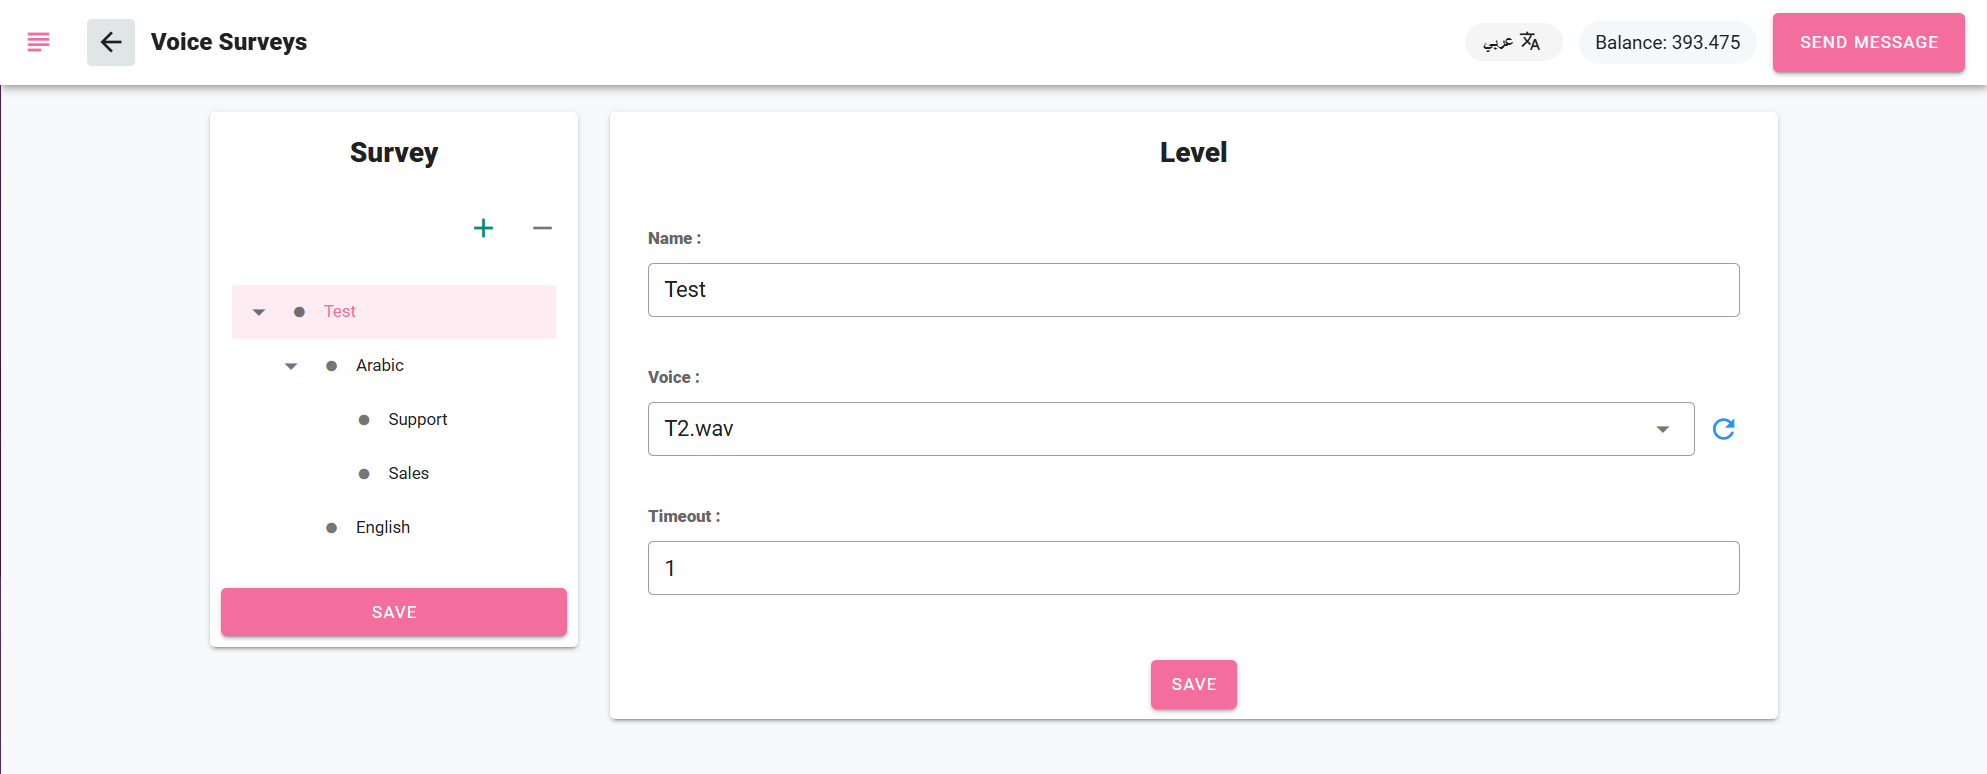
- Create Survey
- Click on the "Create Survey" button.
- Enter a name for this stage, as it will be the name of the survey.
- Choose the audio file to be used and set the time duration, which is the time to wait before this stage expires and repeats.
- Select the number to be pressed to move to this stage, noting that each stage has a specific number assigned, and it cannot be used in other stages.
- After saving this stage, you need to select it from the survey list and click the "+" button to add a new stage under the selected one.
- When adding stages, they are considered as child stages of the previous stages (like a tree structure). You need to define the options that will take you to this stage.
- Repeat these steps until you achieve the final structure of the tree, as shown in the images.
- Once done, click the "Save Survey" button.
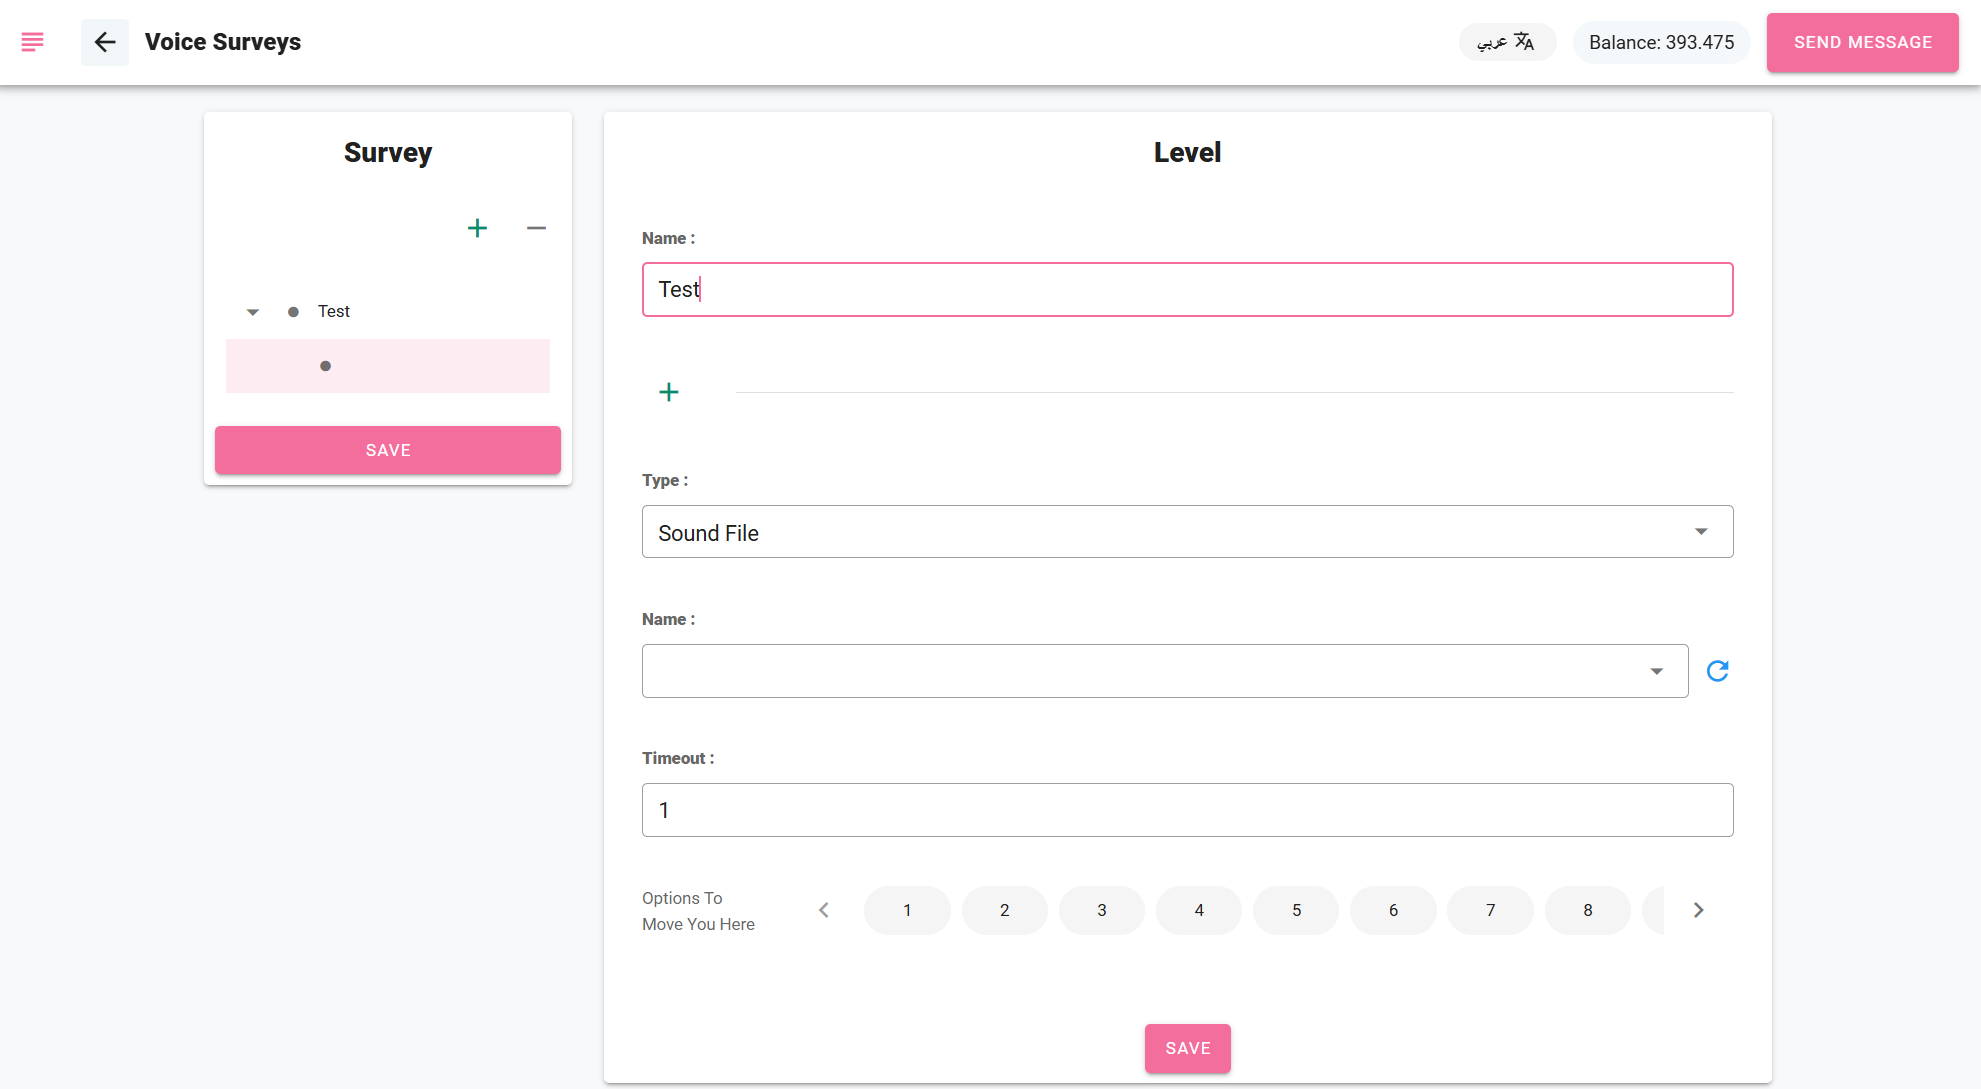
- Create Dynamic Survey
- Click on the "Create Dynamic Survey" button.
- Enter a name for this stage, which will be the name of the survey.
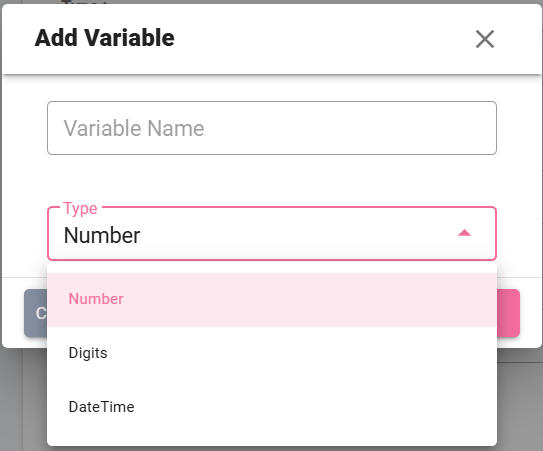
- Choose the type, either "Audio File" or "Variable," as shown in the following image.
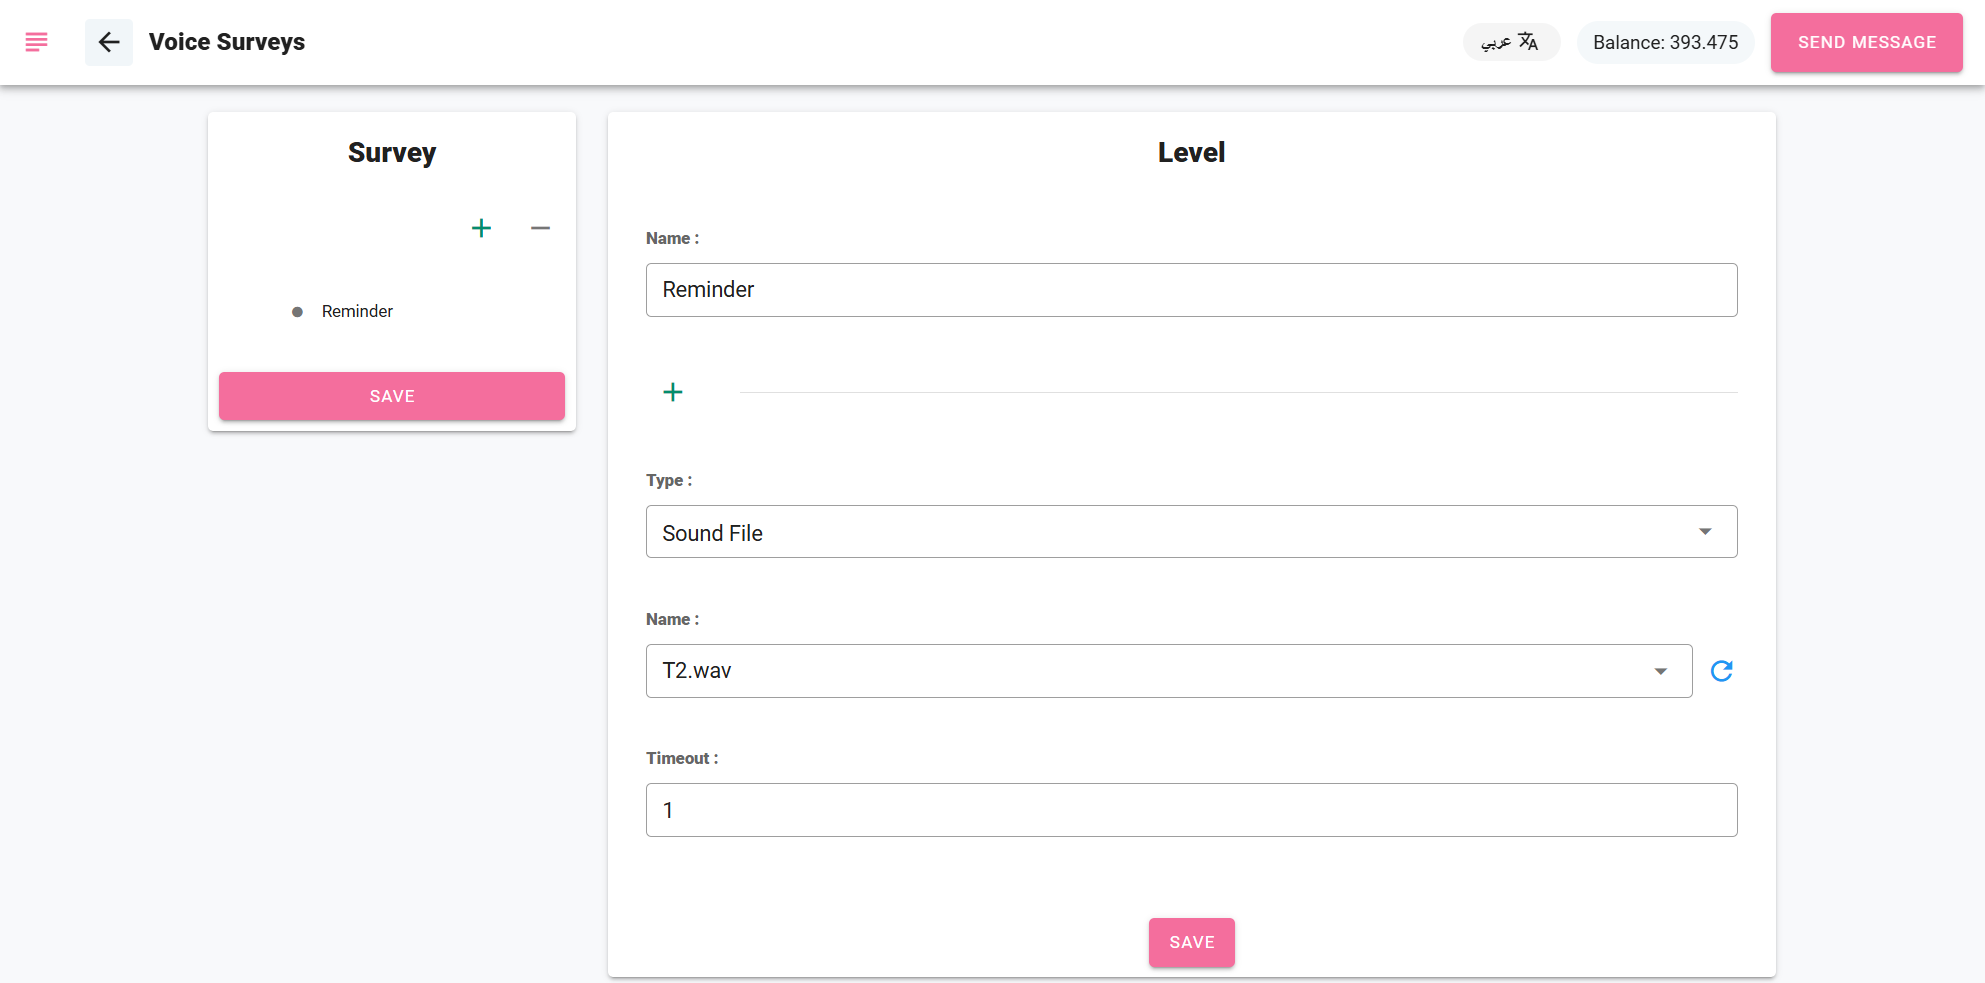
- After that, choose the type of variable: either Time Date, Digits, or Number.
- Select Number when the variable is a number like 96 or 250.
- Select Digits to read a national ID number or mobile number, where each digit is read individually.
- Use Time Date for date and time.
5. Choose the expiration time, which is the time to wait before this stage expires and repeats.
6. By selecting the "+" button, you can add more levels, whether they are audio files or variables.
7. Choose the number to be pressed to move to this stage, noting that each stage has a specific number assigned, and it cannot be used in other stages.
8. After saving this stage, you must select it from the survey list and click the "+" button to add a new stage under the selected one.
When adding stages, they are considered child stages of the previous stages (like a tree structure). You need to define the options that will lead you to this stage.
Repeat these steps until you achieve the final structure of the tree. A new stage can be added under the selected stage to choose a custom number to guide you back to the same stage at the specified level, as shown in the following image:
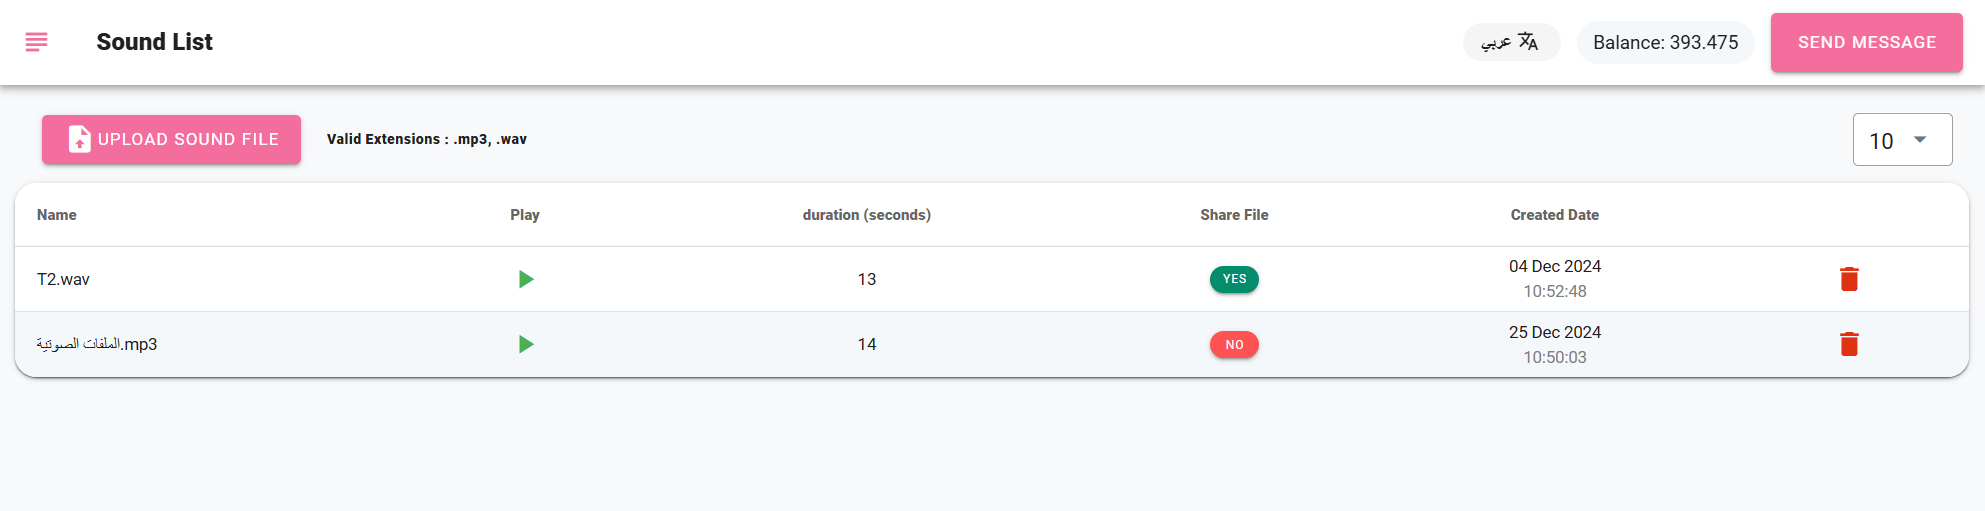
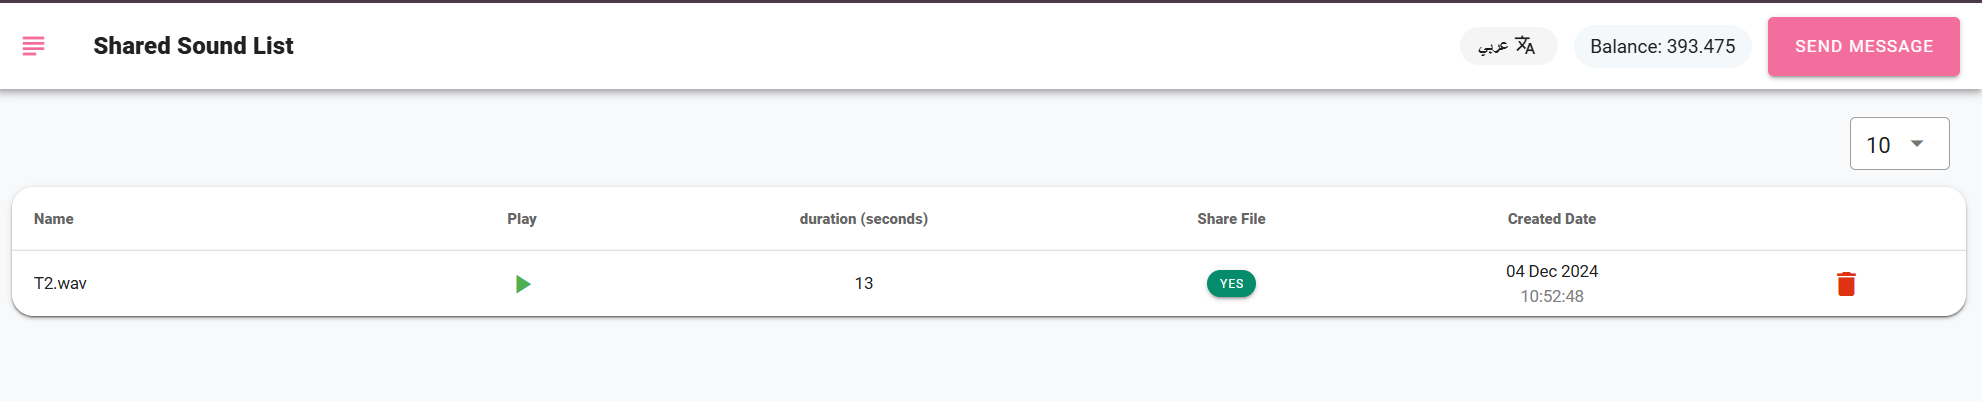
- Sound List
This page displays the list of uploaded audio files, where you can:
Audio files to be used must be uploaded in WAV or MP3 formats.
Through this page, you can share the audio files by selecting the "Yes" option in the same row as the file you wish to share.
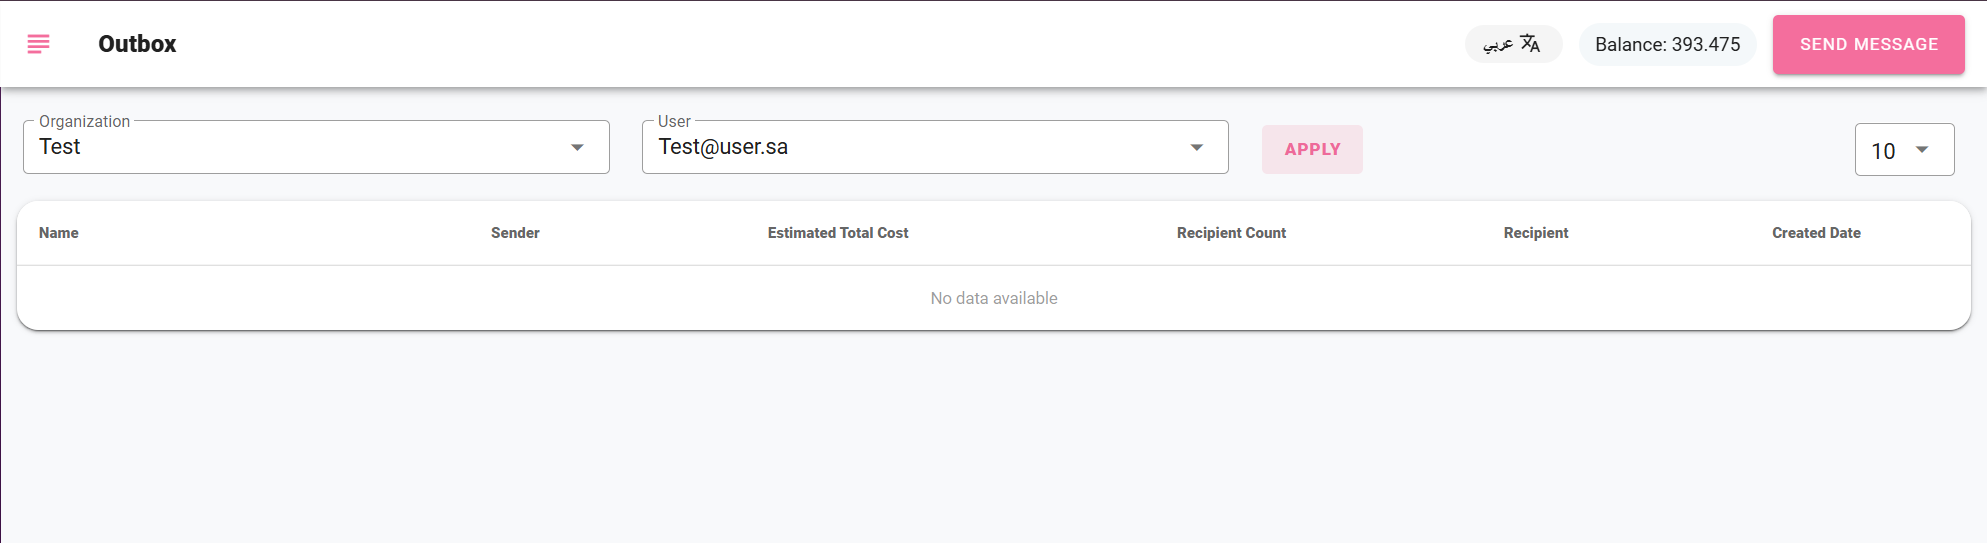
Through this page, you can browse the Outbox voice calls. When you open the Outbox, a list will appear containing all the previous outgoing calls, showing the following details: Name of the voice survey, Sender, Total cost, Recipients, Creation date.
Through this page, you can share audio files with users in your management. You can also delete them at any time if you no longer wish to use them.
- Voice Calls:
Through this page, you can send voice calls to contacts.
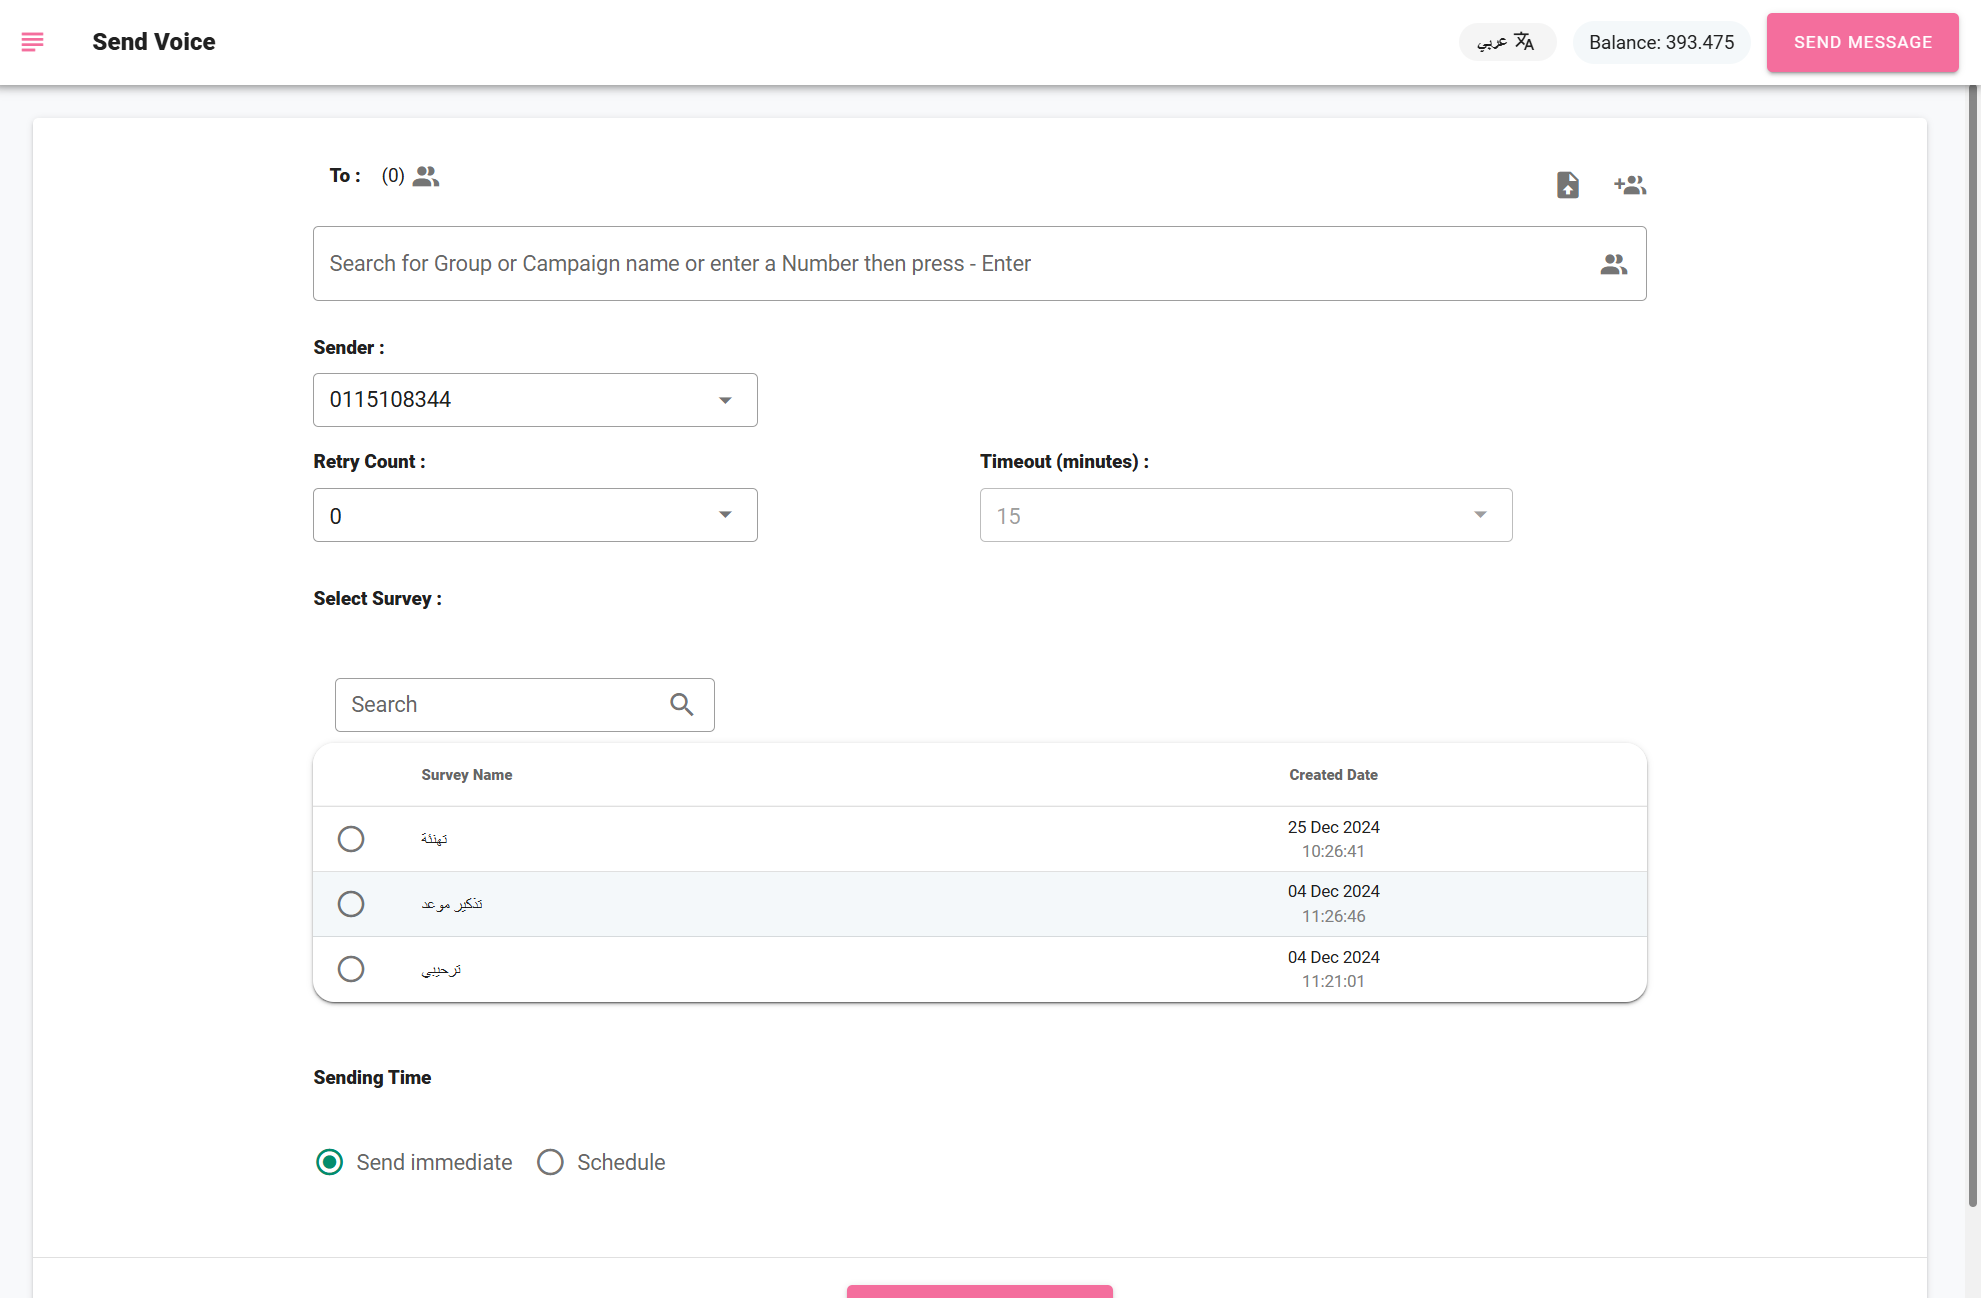
- To send voice calls containing a standard survey, follow these steps:
- The user can send the survey to multiple recipients. Enter the name of the pre-added group or type the number in the input box and press Enter.
- Select the sender name from the list of pre-created senders that will appear as the caller ID.
- Choose the number of retry attempts for calling the specified number and set the interval between each call.
- Select the survey to be sent to these numbers, as shown in the image.
- Click "Send Now" to send the voice call immediately, or choose "Scheduled Send" to specify the desired date and time for sending, then click "Send".
- To send voice calls containing an interactive survey, follow these steps:
- The user can send an interactive survey to only one recipient. Type the number in the input box and press Enter.
- Select the sender name from the list of pre-created senders that will appear as the caller ID.
- Choose the number of retry attempts for calling the specified number and set the interval between each call.
- Select the survey to be sent to this number, as shown in the image.
- Click "Send Now" to send the voice call immediately, or choose "Scheduled Send" to specify the desired date and time for sending, then click "Send".
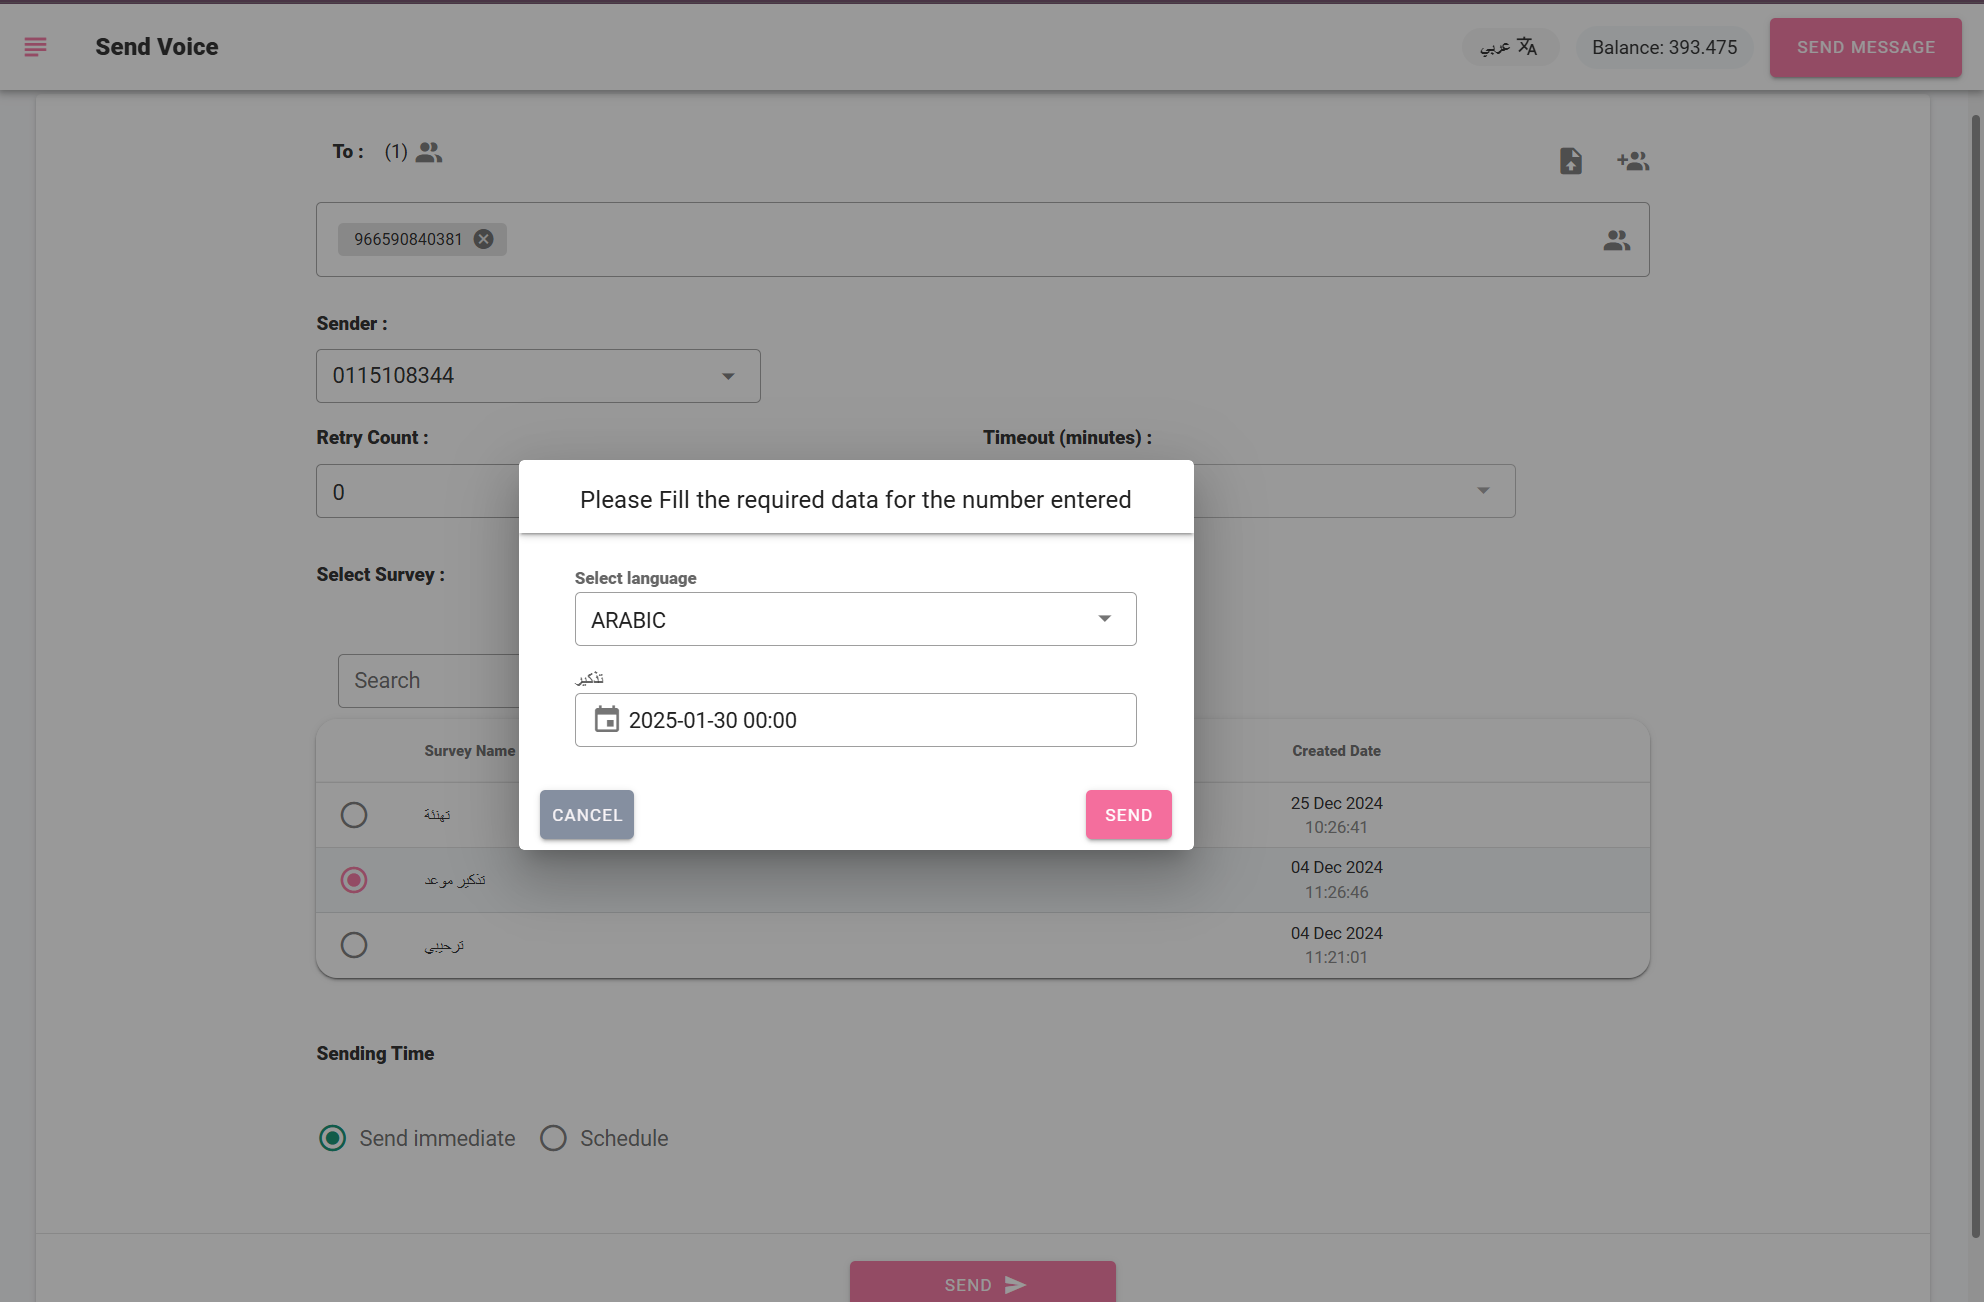
- The system will prompt the user to enter values for the variables in the survey, such as entering a national ID number, as shown in the following image.
- After entering the values, the system will confirm the submission.

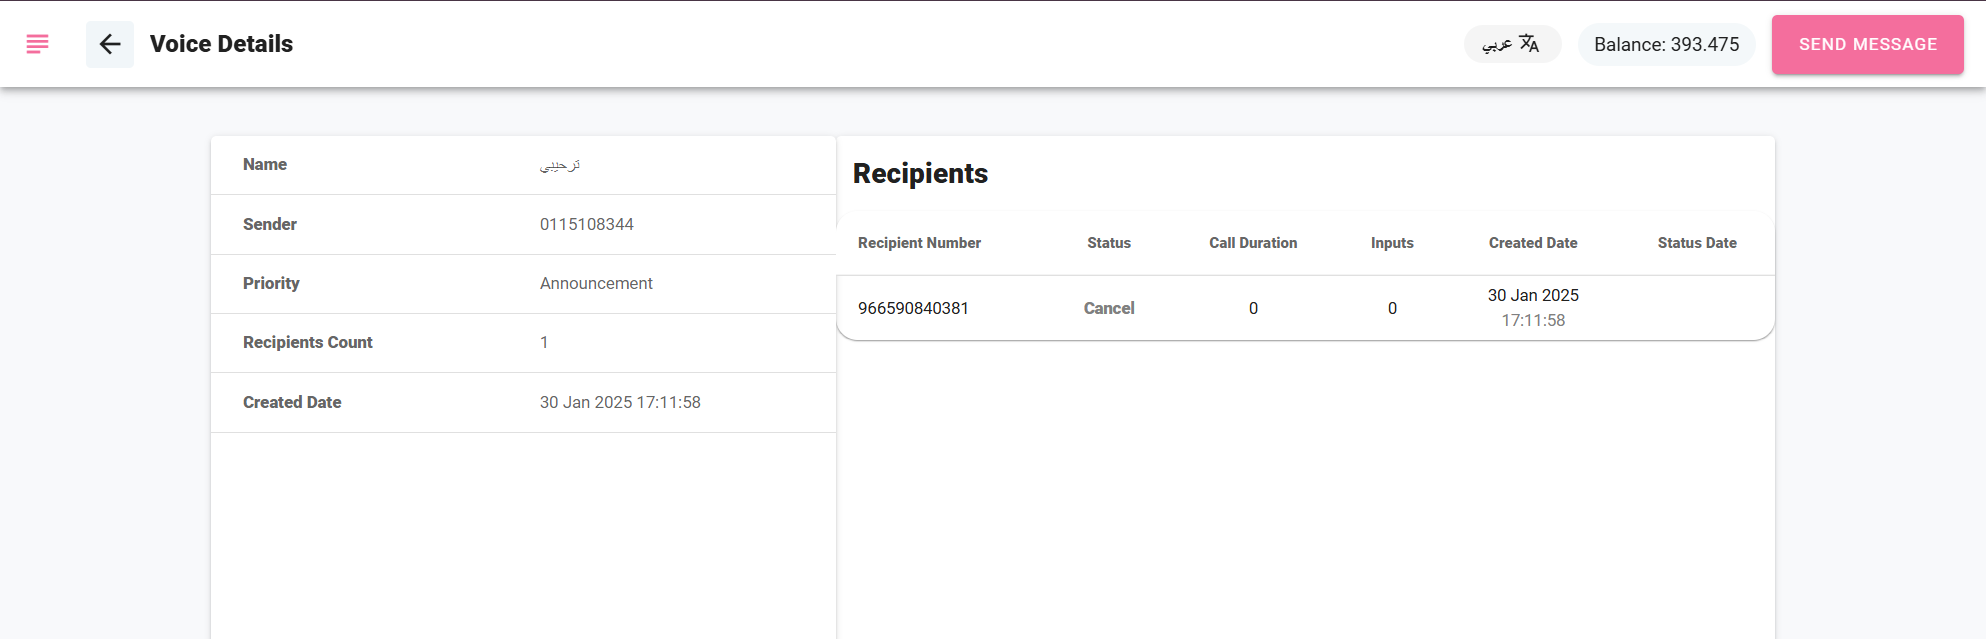
Outbox Page:
- When clicking on the survey name, the details of the voice message will be displayed, including: Response Status: (Answered, Not Answered, or Canceled) Call Duration, Creation Date, Status Date, Estimated Cost per Recipient & Total Cost.
- Additionally, the options entered by the recipient are shown. The system allows users to filter results based on status or search using a specific number. This data can also be exported as an Excel file.